Importing Files to Originals
Most users with an existing library will want to index their originals directly without using the optional import feature, leaving the file and folder names unchanged. Importing first copies or moves from their source directory to the originals folder, which is optional.
-
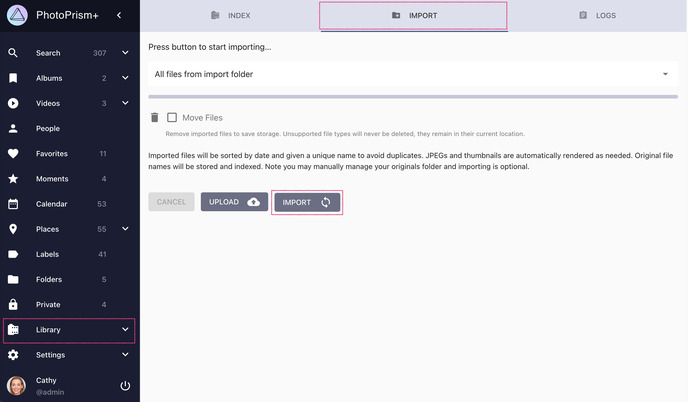
Add files to the import folder if not done already
-
Go to Library using the main navigation, and open the Import tab
-
Select a sub-folder or keep the default to import all files
-
Select Move Files if you want imported files to be removed from the import folder
-
Click on Import
You may use WebDAV for adding files to the import folder. This is especially helpful if PhotoPrism is running on a remote server.
Import is not possible in read-only mode because it requires write permissions to the folder of originals.
When should "Move Files" be selected?
If you select this option, files that have been moved to the originals folder, or that already exist, will be automatically deleted from the import folder. This way you save disk space if you don't want to keep them as backup or for other reasons.
Automatic Import
An import is triggered automatically when files are synced to the import folder via WebDAV.
The default safety delay for automatic import is 3 minutes. You can change it using the PHOTOPRISM_AUTO_IMPORT config option.
Can I use PhotoPrism to sort files into a configurable folder structure?
You have complete freedom in how you organize your originals. If you don't like the unique names and folders used by the import function, you can resort to external batch renaming tools, for example:
Configurable import folders may be available in a later version. This is because - depending on the specific pattern - appropriate conflict resolution is required and the patterns must be well understood and validated to avoid typos or other misconfigurations that lead to undesired results for which we do not want to be responsible.